 ultimate-guide
How to Document Family Memories: A 2026 Guide
Table of Contents
- Why Documenting Family Memories Matters Now
- Family History Interview Questions That Get Real Stories
- Best Tools for Archiving Family Photos and Documents
- How to Write a Family Memoir Step by Step
- Organizing Memories in Chronological Order
- Cloud Storage vs. Physical Backup Strategies
- Digital Estate Planning for Your Memories
- Frequently Asked Questions
Last Updated: September 10, 2026
Why Documenting Family Memories Matters Now
According to the Oral History Association, the voices of those who lived through the twentieth century are disappearing faster than most families realize. Learning how to document family memories is the difference between a story that survives and one that fades within a generation.
The stakes are practical, not sentimental. When a parent dies without leaving an account of their life, adult children inherit a legal estate and almost nothing else: no stories, no context, no record of what mattered. That gap is what this guide closes. Below, we'll walk through the interview questions that draw out real answers, the tools that keep photos and documents safe, and the storage and privacy decisions most families never think about until it's too late.
Family History Interview Questions That Get Real Stories
The best family history interview questions are specific, open-ended, and gently sequenced. "Tell me about your childhood" gets a shrug. "What did your street sound like on a summer evening?" gets a story.
Setting Up a Comfortable Recording Session
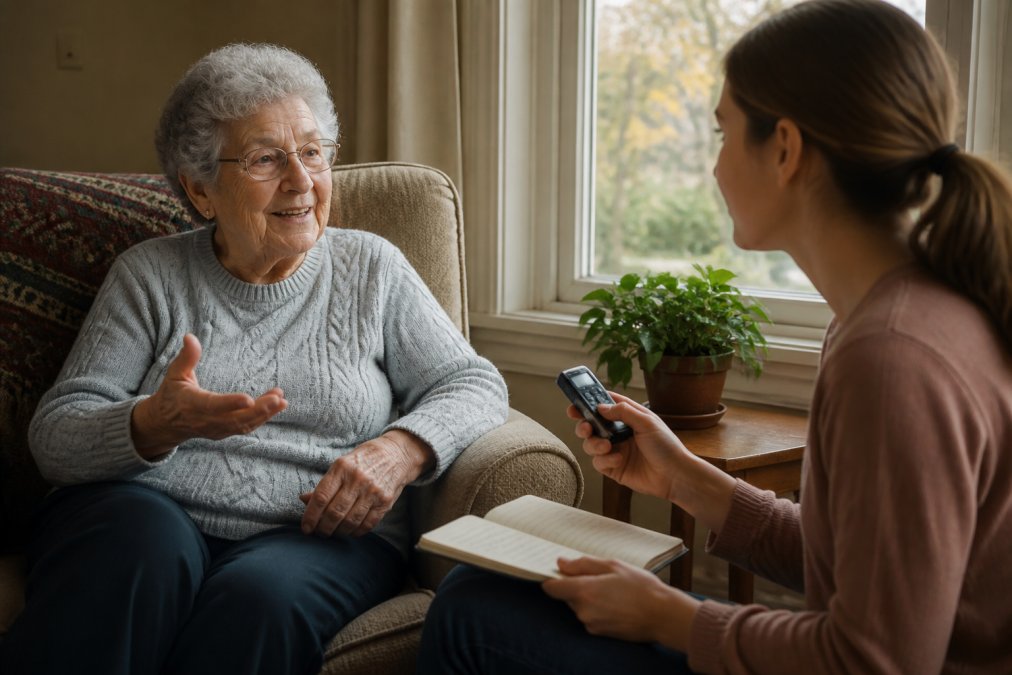
Choose a quiet room, sit at an angle rather than across a table, and keep the recorder visible so nobody feels spied on. One hour is plenty for a first session. Let silence sit for a few seconds after an answer; people often fill it with the detail you actually wanted.
Questions to Ask About Childhood, Work, and Love
Draw from these prompts and follow the thread wherever it leads:
- What was the first job you were paid for, and what did you spend the money on?
- Who was your closest friend growing up, and what happened to them?
- How did you meet the person you married, and what did your parents think?
- What is the hardest decision you ever made?
- What do you hope your grandchildren never have to face?
Best Tools for Archiving Family Photos and Documents
The best tools for archiving family photos combine a flatbed scanner, consistent file naming, and a backup routine you will actually maintain. Fancy software matters far less than doing the boring parts correctly.
Scanning and Digitizing Physical Photos
Scan at 600 dots per inch for prints and 300 for documents, and save masters as TIFF files with JPEG copies for sharing (archives.gov). Handle prints by the edges, and clean the scanner glass between batches. Label every file the moment it leaves the scanner; a folder called "old photos" is a dead end.
Metadata and Tagging Best Practices
Metadata is the written record that tells future readers who, what, when, and where a file shows. Most photo apps let you add names, dates, and locations directly, and that information travels with the file when it's copied. Use one naming convention across the whole archive, such as year-month-day and a short description. Without it, a digitized collection becomes an unlabeled box you never open.
| Task | Frequency | Why It Matters |
|---|---|---|
| Scan a batch of prints | Weekly, 20-30 photos | Steady progress beats one exhausting weekend |
| Add names and dates | Same day as scanning | Context is lost within days, not years |
| Verify backup completed | Monthly | Catches silent failures before they compound |
| Review file naming | Quarterly | Keeps the archive searchable as it grows |
How to Write a Family Memoir Step by Step
A family memoir is a written narrative built from recorded interviews, documents, and your own memory. Write it in short chapters organized by decade or theme, and quote your relatives directly rather than paraphrasing. Start with the person you know best. Aim for 1,500 to 3,000 words per chapter, and expect the first draft to be rough; revision is where the story sharpens. For guidance on structure and ethics, the Library of Congress family history resources offer a solid starting framework.
Organizing Memories in Chronological Order
Chronological order is the default for a reason: it lets any reader follow the story without a guide. But "make a timeline" is advice, not a method. Here is the method most family archivists actually use.
Build the Skeleton Before You Sort Anything
Start with a single master timeline document, a spreadsheet, a plain text file, or a dedicated genealogy program, and list only hard anchor events: births, deaths, marriages, moves, military service, immigration dates, graduations, and job changes. Add a date where you have one and a question mark where you don't. A useful anchor is any event you can pin to a year, even approximately.
Then sort every photo, recording, letter, and written piece against those anchors. A photograph of a child on a porch is undated until you notice the car in the background matches the one your grandfather bought the year he changed jobs. Anchors turn unlabeled material into dated material.
Handle the Gaps Deliberately
Gaps are fine. Mark them and keep going, because a timeline with holes still beats a pile of unsorted material. A common pattern is a decade or more with almost no documentation, often the years when a family was busiest and least likely to be photographing anything. Write a short placeholder note in that slot ("1948-1959: family moved twice; no photos located") so a future reader knows the silence is a records gap, not a story you skipped.
Choose a Structure That Survives Growth
Three structures work, and the right one depends on how much material you have:
- Strict chronological, best for a memoir or a single narrated life story. Every item gets one date and one place in the sequence.
- Decade or era buckets, best for large, uneven collections. Group everything into ten-year folders, then sort within each folder. This is the most forgiving structure when dates are approximate.
- Thematic with a timeline index, best for collections organized around topics (military service, immigration, a family business). Keep the themes as folders, but maintain one master timeline as the index that ties them together.
Whichever you pick, keep the master timeline as the single source of truth. Folders can be reorganized; the timeline is what tells you what you have and what you're missing.
Cross-Reference Instead of Duplicating
When one item belongs in two places, a wedding photo that is both a family event and part of a military homecoming, do not copy it into both folders. Keep one master file and reference it from the other location. Duplicates are how archives drift out of sync, and they make it impossible to know which version is the one you edited.
Cloud Storage vs. Physical Backup Strategies
Every serious archive needs three copies: the working copy, a local backup on an external drive, and an offsite copy in cloud storage. This is the widely used 3-2-1 approach, and it protects against the two most common disasters, a failed drive and a house fire. But the rule is easy to state and easy to get wrong in practice. Here is what it looks like for a family media archive specifically.
What the Three Copies Actually Are
- Copy 1, the working copy. The drive on your computer where you scan, edit, and organize. This is the copy you touch every week. It is also the copy most likely to be damaged by a mistake, a malware infection, or a spilled drink.
- Copy 2, the local backup. An external drive that stays in your home, connected only long enough to run a backup. Keep it unplugged between backups so a power surge or ransomware event cannot reach it at the same time as your working copy.
- Copy 3, the offsite copy. Cloud storage, or a second external drive stored at another address. This is the copy that survives a fire, flood, or theft.
A common mistake is treating a synced cloud folder as a backup. Sync is not backup: if you delete a file locally, the deletion syncs too. Use a service that keeps version history, and confirm how long that history is retained before you rely on it.
A Backup Routine You Will Actually Maintain
- Weekly: run the local backup after a scanning session. Twenty to thirty photos is a realistic weekly batch; steady progress beats one exhausting weekend.
- Monthly: confirm the offsite copy finished uploading, and open two or three random files from it. A backup you have never opened is a hope, not a backup.
- Quarterly: review your file naming and folder structure while the archive is still small enough to fix.
- Annually: test a full restore of one folder onto a clean drive. This is the step almost everyone skips and the one that catches silent failures before they compound.
The Trade-Offs Nobody Mentions
Cloud storage handles the offsite leg well, but it depends on a company that may change its terms, raise prices, or shut down. Physical media has the opposite problem: it survives company changes but degrades, and consumer hard drives are not designed to sit unpowered for a decade. The practical answer is to use both, and to migrate your physical copies to fresh drives on a regular cycle rather than trusting a single drive to outlast you.
Choosing Between Them
If you have to start somewhere, start with the offsite copy. A cloud account is inexpensive, requires no hardware, and protects against the loss that is hardest to recover from. Add the local external drive next, then build the habit of verifying both. The goal is not a perfect system, it is a system simple enough that you keep running it for the next twenty years.
Digital Estate Planning for Your Memories
Digital estate planning is the practice of deciding who inherits your online accounts, files, and digital archive, and recording those decisions where your family can find them. Most wills address property and bank accounts and say nothing about a cloud photo library or a password manager. Name a digital executor, list your accounts and where the credentials are stored, and keep that list with your will rather than in your head.
Ethical Storytelling and Privacy Considerations
Family archives hold information about people who never agreed to be recorded. Before sharing anything publicly, ask what the person in the story would want, and when in doubt, keep it private. Confirm with living relatives before quoting them, and treat sensitive material about third parties as off-limits unless they consent.
Families rarely regret the hours spent recording a parent's voice; they regret the years they assumed there would be more time. My Living Legacy Course is a compassionate, guided online program designed to help you thoughtfully organize and pass down your unique life story, personal wishes, and final arrangements to your loved ones. Through seven comprehensive modules and over 420 reflective prompts, this course provides an essential companion to your will, ensuring your family receives clarity and support beyond legal documents during difficult times. With lifetime access for a one-time fee, you can capture your narrative at your own pace, creating a meaningful legacy that truly informs and comforts those you cherish.
Frequently Asked Questions
What is the best way to start documenting family history?
Start with one conversation. Sit down with an older relative, ask open-ended family history interview questions, and record the answers on your phone. Then scan one box of photos and label them with names and dates. You do not need a perfect system on day one. A single recorded story and a folder of labeled photos give your family more than most people ever capture.
How do I organize 100 years of family photos?
Sort first by decade, then by family branch. Scan photos at 600 dpi for prints and save them as TIFF or high-quality JPEG. Add metadata like names, dates, and locations to each file. Store the originals in acid-free boxes away from sunlight, and keep digital copies in two places: a cloud account and an external hard drive.
What should I include in a family legacy project?
A complete legacy project includes recorded interviews, digitized photos and documents, a written memoir or timeline, and a letter to future generations. Add a list of heirlooms with their provenance so your family knows what each item is and why it matters. The goal is to document family memories in a way your grandchildren can understand without needing to ask you.
How can I interview elderly relatives to capture their memories?
Keep sessions to 30-45 minutes and ask one question at a time. Use prompts about childhood, school, first jobs, and how they met their spouse. Record with their permission, and follow up with a second visit rather than pushing for everything at once. Write down names and places as they come up, because those details are hardest to recover later.
What are the best tools for archiving family photos?
For scanning, a flatbed scanner works for most prints, and a phone scanning app handles quick jobs. For storage, use a cloud service plus an external hard drive so you have both a backup strategy and local access. Label files with a consistent naming format like LastName_Year_Event. Free tools exist, but paid options often include better metadata support and larger storage.
How do I digitize physical family heirlooms and records?
Photograph three-dimensional items from multiple angles against a plain background. Scan paper documents, letters, and certificates at 300-600 dpi. Record a short video or audio note explaining each item's story and provenance. Store everything in a folder named after the family branch, and write the same information on a physical tag attached to the original item.