 how-to
How to Digitize Old Family Home Movies: A Step-by-Step Guide
Table of Contents
- Why Digitizing Your Family Home Movies Matters Now
- How to Digitize VHS Tapes and Other Videotape Formats
- Best Format for Digitizing Home Movies and Long-Term Storage
- DIY Digitization vs Professional Home Movie Digitizing Services
- VHS to Digital Conversion Cost and Budget Expectations
- Digitizing 8mm Film and Other Film Formats
- Organizing, Backing Up, and Sharing Your Digital Family Memories
- Conclusion: Preserving Your Family Legacy
- Frequently Asked Questions
Last Updated: October 13, 2026
Why Digitizing Your Family Home Movies Matters Now
Your family's recorded memories are disappearing, which is why you should digitize family home movies before it's too late. VHS tapes degrade, film reels become brittle, and camcorder tapes lose color fidelity.
Digitizing family home movies isn't just about convenience, it's about preventing loss.
The best ways to digitize old family home movies depend on what you have, your technical comfort level, and your budget. Some families DIY with basic equipment; others hire professionals with specialized tools and climate-controlled storage.
At My Living Legacy Course, we understand that preserving family memories is part of a larger legacy effort. Digitized videos become part of the story you pass down alongside your personal narratives, wishes, and final arrangements.
How to Digitize VHS Tapes and Other Videotape Formats
Transferring VHS tapes to digital follows one basic principle: play the original tape, capture the signal in real time, and save it as a computer file. Your equipment needs depend on whether your playback device still works and whether you have the right cables.
Gather Your Equipment and Playback Devices
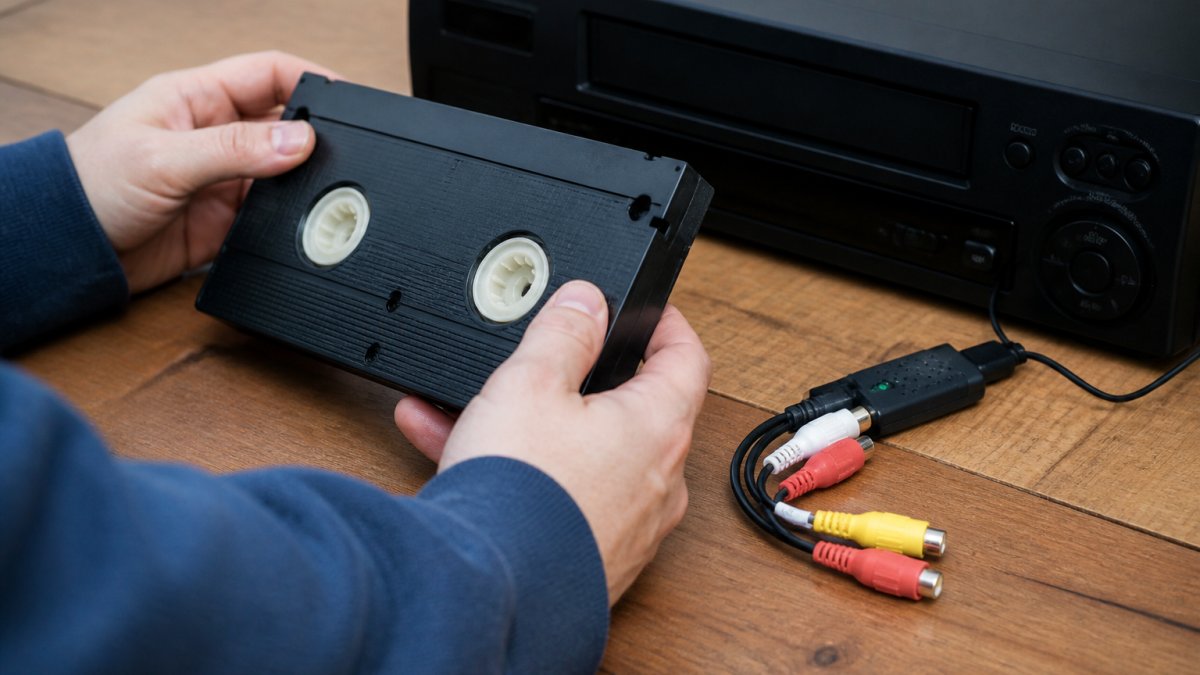
You'll need three things: a working player for your tape format, a capture device to convert the analog signal, and a computer to store the file.
For VHS tapes, you need a functioning VCR. Test it with a tape you don't care about first, checking for tracking noise or picture distortion.
A video capture device like the Elgato Video Capture connects between your VCR and computer.
For camcorder tapes in formats like Hi8, MiniDV, or Digital8, you need the original camcorder or a compatible player. These use smaller cassettes and different connectors than VHS.
For Betamax or other uncommon formats, finding a working player is harder. Some locate used machines online, but availability varies. If you can't find one, a professional service is your only option.
Inspect and Prepare Your Tapes Before Transfer
Tape deterioration happens slowly, then accelerates. Tapes stored in damp basements, hot attics, or direct sunlight degrade faster. Before you digitize, inspect each tape for damage.
Look for mold, white or green spots on the tape or inside the cassette. Moldy tapes can damage playback equipment, so do not play them yourself.
Check for visible cracks, tears, or separation. Heat-exposed tapes sometimes separate, where the magnetic coating pulls away from the plastic base. These may not play at all or may jam the player.
If the tape looks intact, gently clean the outside cassette with a soft, dry cloth, never solvents or water. Dust and debris can scratch the tape heads during playback, affecting picture quality and damaging the player.
Store tapes upright in a cool, dry place until you're ready to digitize. Tapes stored horizontally or in extreme temperatures degrade faster.
Capture and Convert Your Video
The transfer process is straightforward but requires patience: plan to spend about as much real time as the tape length. A 2-hour tape takes roughly 2 hours to digitize.
Connect your playback device to the capture device with the correct cables. For a VCR, use RCA cables (the three-colored connectors).
Install the software that came with your capture device and set the recording quality. Higher quality means larger files but better clarity, start with the highest your storage allows.
Insert the tape, press play on the source device, and start recording in the software. Watch the preview to confirm the picture appears.
When the tape ends, stop the recording. Name the file clearly with the tape number and date if you know it, "Family_Vacation_1995_Tape_A," not "Video 1" or "Tape."
Best Format for Digitizing Home Movies and Long-Term Storage
The file format you choose affects picture quality, file size, and how easily you can share or edit the video later.
MP4 is the most practical choice for most families. It compresses efficiently, plays on nearly every device (phones, tablets, computers, smart TVs), and is supported by all major cloud services.
MOV is Apple's equivalent. If you're on a Mac and staying in the Apple ecosystem, MOV works well, but it's less universal outside Apple devices.
AVI is the raw format older capture devices produce. AVI files are larger and less compatible with modern devices. Avoid AVI unless your software forces it; if you end up with AVI files, convert them to MP4 with free software like HandBrake.
For long-term storage, the format matters less than having multiple copies.
This redundancy protects against equipment failure, accidental deletion, and physical loss.
DIY Digitization vs Professional Home Movie Digitizing Services
The choice between doing it yourself and hiring a professional service comes down to three factors: cost, time, and quality.
When to Choose DIY Transfer
DIY digitization makes sense if you have a small number of tapes, working playback equipment, and patience for a time-consuming process.
You save money: the only costs are a capture device (which you might borrow) and external storage. A service might charge more for 10 hours of tape; DIY costs nearly nothing beyond equipment.
You control the timeline, digitizing a few tapes per week at your own pace without waiting for a service to process and return your originals.
You keep the originals in your hands, which many people prefer over mailing tapes to a company.
The trade-off is time and technical skill: several hours per tape, troubleshooting if the capture device doesn't recognize your computer, and basic file management to keep videos organized.
When to Use a Professional Service
Professional services make sense if you have many tapes, broken or hard-to-find equipment, or tapes in poor condition.
Services handle rare formats. For Betamax, U-matic, or other uncommon tape types, finding a working player is nearly impossible for an individual; professionals maintain equipment for dozens of formats.
Services preserve fragile originals. If your tapes show mold, separation, or brittleness, handling them yourself risks further damage; professionals work in climate-controlled environments and know how to handle deteriorating media safely.
Services save time. If you have 50 hours of tape, DIY takes weeks; a service completes the work in days and returns your originals untouched.
The cost is higher. Services charge per minute of video transferred, which adds up for large collections.
VHS to Digital Conversion Cost and Budget Expectations
DIY digitization costs are minimal. A capture device is a one-time purchase, and external hard drives range from basic to high-capacity.
Professional services charge by the minute, and pricing varies by service and format. Standard VHS conversion typically costs less than specialty formats like 8mm film or Betamax, and some services offer large-order discounts.
Most services offer different output formats and delivery methods. Faster turnaround costs more, while slower standard processing costs less.
Some services include basic editing, color correction, or format conversion in their base price; others charge separately. Read the fine print before ordering.
If you're digitizing a large collection, ask services about volume discounts. Some offer reduced per-minute rates for orders over a certain length.
Digitizing 8mm Film and Other Film Formats
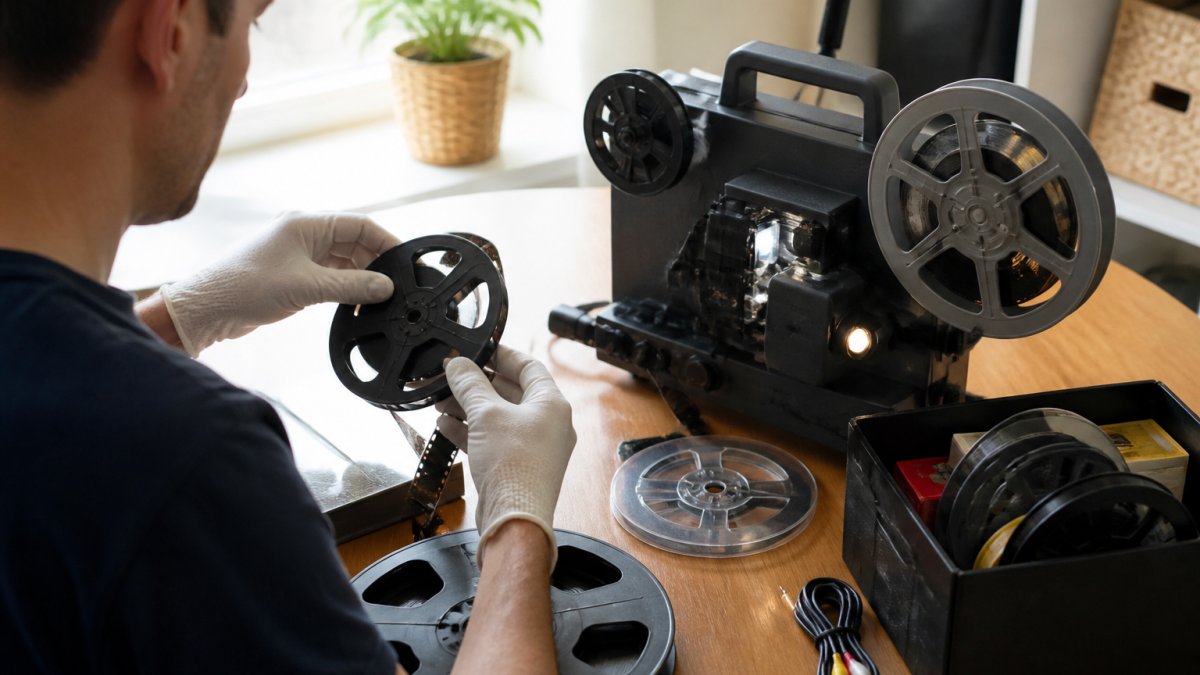
Film formats like 8mm and Super 8 require different equipment than videotape. Film doesn't degrade as quickly as tape, but it becomes brittle over time and can break during playback.
A film digitizer captures images from film one frame at a time, projecting light through the film and photographing each frame with a high-resolution sensor.
Home film digitizers are available but expensive, a basic model costs several hundred dollars. Professional film scanning services are often more practical for most families.
Before attempting DIY film digitization, inspect the film carefully. Brittle film that cracks easily, or film with a strong vinegar smell (vinegar syndrome, indicating chemical breakdown), should go to a professional.
For families with film in good condition and a small amount of footage, a film digitizer can work. For large collections or damaged film, professional services are safer and often produce better results.
Organizing, Backing Up, and Sharing Your Digital Family Memories
Once your videos are digitized, organization and backup determine whether you can actually use them years from now.
Create a folder structure based on year and event: "2024_Family_Vacation" or "1995_Home_Movies_Tape_1." Avoid vague names like "Videos" or "Old_Stuff."
Name files clearly, "1995_Tape_A_Part_1.mp4" beats "VHS_001.mp4", so you and your family can find specific memories without watching every file.
Back up immediately after digitizing: copy files to an external hard drive and to cloud storage. After 10 tapes, you have three copies, computer, hard drive, and cloud, and that redundancy prevents loss.
Organize backups the same way as your main files; a disorganized backup is useless when you need to find something.
Share selectively with family.
Add context to shared videos: a brief description of when and where each was recorded, plus names of people in the video. This becomes more valuable over time as memories fade.
Conclusion: Preserving Your Family Legacy
Your family's memories deserve protection. Whether you digitize old family home movies yourself or use a professional service, the goal is the same: ensure these moments survive and remain accessible to future generations.
The best ways to digitize old family home movies fit your situation. Start with what you have. Test your equipment. Make a plan. Then execute it consistently until the job is done.
Beyond digitizing videos, consider how these memories fit into your larger legacy. With lifetime access, you can work at your own pace, capturing your narrative alongside the visual memories your family treasures. AARP's guide to digitizing home movies and film provides additional technical resources. Library of Congress preservation guidelines offers best practices for long-term digital storage. Consumer Reports on video digitization services compares professional options if you decide that route is right for you.
| DIY Digitization | Professional Service |
|---|---|
| Cost | $100-200 for equipment |
| Time | Several hours per tape |
| Best For | Small collections, working equipment |
| Quality Control | You manage it |
| Equipment Needed | Capture device, external drive |
Frequently Asked Questions
What's the fastest way to digitize old family home movies if I'm not tech-savvy?
Professional digitization services handle everything for you, you mail in your tapes, and they return digital files on USB drives or via cloud storage. Services accept a range of formats and manage the technical work. This approach works well if you have limited technical experience or many tapes to convert. The trade-off is cost; professional services charge per tape or per minute of video.
How long do VHS tapes last, and should I digitize mine soon?
VHS tapes degrade over time, especially if exposed to heat, humidity, or repeated playback. Most tapes remain watchable for 20-30 years, but quality loss begins after 10-15 years of storage. If your tapes are from the 1980s or 1990s, digitizing them now preserves the content before further deterioration. The longer you wait, the higher the risk that playback equipment will fail or tape damage will worsen.
What's the best format for digitizing home movies to keep them forever?
MP4 is the most practical format for long-term storage and sharing, it's widely compatible, smaller in file size, and plays on nearly all devices. For archival purposes, some people also keep a backup in a less-compressed format like MOV or AVI. Store multiple copies on different devices: an external hard drive, cloud storage, and ideally a second external drive kept in a separate location. This redundancy protects against drive failure or loss.
Should I digitize home movies myself or use a professional service?
Choose DIY if you have working playback equipment (VCR, camcorder, or film projector), a capture device, and patience for the process. It's cheaper upfront but time-intensive. Choose a professional service if you have many tapes, fragile originals, or want guaranteed quality and expert handling. Services also handle rare formats like Betamax or 8mm film more reliably. Consider your timeline, budget, and comfort level with technical setup.